The Chic Country Girl
A lifestyle Blog...
Saturday, January 28, 2023
Food: Recipe | Orange Cranberry Loaf with Orange Icing
Wednesday, January 19, 2022
Recipe : Healthy Homemade Granola
If you make this for yourself let me know how you like it.
Tag me on Instagram with your finished product
@ChicCountryGirl
Emily
Disclaimer: Any photos used are mine unless otherwise posted. This post was 100% created by me and photos are copyrighted to TheChicCountryGirl, If your sharing any of them please give credit to this site. This is not a sponsored post
Tuesday, January 4, 2022
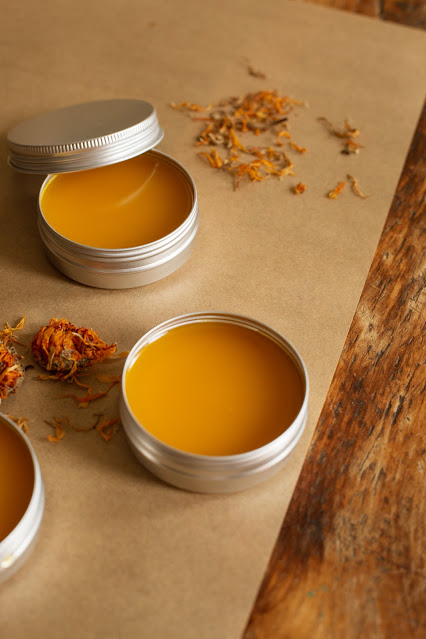
DIY: Calendula Salve Homemade Body Care | Use For Dry Skin Cuts & Eczema
Ingredients :
Calendula oil
1 Cup Jojoba Oil (or any carrier oil you like)
Dried Calendula flowers, fill 3/4 a mason jar with flowers
Cover dried flowers with oil and let sit for 6-8 weeks, in a cool dark place
Salve:
Strain out flowers into cheesecloth , collecting oil in a measuring cup or bowl.
6-8 tablespoons Beeswax
2 tablespoons Shea butter
Using a double broiler or placing a glass mixing bowl atop a pan with water.
Pour your calendula infused oil into bowl, add in beeswax and shea butter. Over medium heat allow for the mixture to melt. It takes a little time to get the beeswax to melt. Just keep an eye on the mixture stirring once in awhile.
Optional: If you'd like you can add an essential oil for fragrance. You'll do this once the mixture has melted
Once everything has melted pour mixture into tin containers. And let cool.
Salve stays fresh for 1 year
If you make this for yourself let me know how you like it.
Tag me on Instagram with your finished product
@ChicCountryGirl
Emily
Disclaimer: Any photos used are mine unless otherwise posted. This post was 100% created by me and photos are copyrighted to TheChicCountryGirl, If your sharing any of them please give credit to this site. This is not a sponsored post
Sunday, December 12, 2021
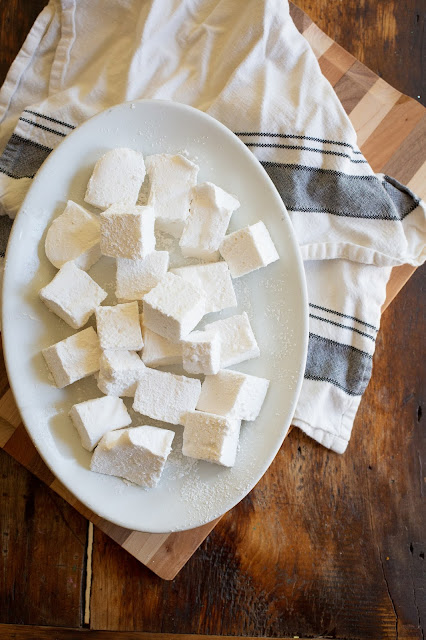
Food : Homemade Marshmallows | Be The Hit This Holiday Season With Made from Scratch Marshmallows
xoxo Emily
Disclaimer: Any photos used are mine unless otherwise posted. This post was 100% created by me and photos are copyrighted to TheChicCountryGirl, If your sharing any of them please give credit to this site. This is not a sponsored post
Tuesday, February 9, 2021
Recipe: Valentines Day | Chocolate Cream Filled Cupcakes with Buttercream Frosting
Hello :)
Valentines Day is this Sunday and you may think its just another day, which I mean technically it is. But why not celebrate those that you love?
Married, dating or single you can still treat those special people in your life to a little treat. And what's more special than a "Chocolate" treat made from the heart? These cupcakes are filled with a yummy homemade whipped cream and mascarpone filling which makes them extra fancy and super tasty.
Recipe: 350F Bake 18-20 minutes
Cupcake:
2 Eggs
1 1/4 cups Sugar
8 tablespoons butter or canola oil
1/4 tsp. Baking Soda
1 1/4 Cups all-purpose flour
1/4 tsp. salt
1 tsp. Vanilla extract
1 cup Milk ( I use 2%)
1/2 cup Cocoa Powder
Filling:
1/2 cup heavy whipping cream
3/4 cup powder sugar
1-2 tsp. Vanilla Extract
4 oz Mascarpone Cheese
Frosting:
1 1/4 Cups Butter
Just under 1/2 cup Cocoa Powder
3-4 Cups Powder Sugar
4-5 tablespoons Heavy cream ( As needed for consistancy you\"re looking for)
Cream your sugar and eggs in a mixing bowl or stand mixer. Add your butter and vanilla. Mix until butter has been combined with your other ingredients. Add in salt, baking soda & cocoa powder. Mix while slowly adding in your milk. Then add flour. Mixing well to throughly combine everything.
Fill your cupcake tin with liners. This batch made 18 cupcakes. Filling the liners 2/3 full.
Bake at 350 for about 18-20s minutes. I always start checking around 15 mins to make sure I don't over cook them. Nobody likes a dry cupcake!
Once you've pulled them out of the over wait 45mins to an hour to let them cool.
When they've cooled off core out your middles.
Filling:
In a mixing bowl and your heavy cream , vanilla & powder sugar. Using a hand mixer or your stand beat for 4-5 minutes until soft peaks begin to form. Once the mixture can stand up on its own add in your mascarpone cheese. TIP I let mine sit out a little before adding to the whipped cream. You want it cold but don\"t rock solid.
Then mix in util fully combined. Should take no longer than a minute or 2. Then filling in a pipping bag and cut off the tip and begin to fill your cored cupcakes.
Frosting:
Place your room temp butter in a mixing bowl and begin to mix. Add in a little cream to help it. Add cocoa and mix. Once the cocoa has combined into the butter begin to add in your powder sugar. Once you've added in all the sugar taste and make sure it doesn't taste like cocoa butter. If it does you can always add a bit more sugar. And if the frosting gets to thick add more heavy cream.
I hope you enjoy this Chocolate cupcake recipe and have a lovely Valentines Day with those you Love!
xoxo Emily
Disclaimer: Any photos used are mine unless otherwise posted. This post was 100% created by me and photos are copyrighted to TheChicCountryGirl, If your sharing any of them please give credit to this site. This is not a sponsored post
Saturday, January 30, 2021
Recipe : Homemade Biscuits | Layers Of Butter & Flakey Crumbs
Hello :)
One of my favorite things in life is a biscuit. You can do anything with them; Make a sandwich out of them , pour gravy on top, or eat them like almost eating dessert by drizzling some honey on them. In any form they are my favorite.
Don't get me started on canned biscuits they taste nothing like a real homemade biscuit; full of a lovely little thing called butter. If your in a time pinch frozen are ok but they will never live up to the truly heavenly thing that is a homemade biscuit.
To make these you don't need much skill or many ingredients. Just a little bit of time and a whole lot of butter. Once you've mastered the art of biscuit making you'll never want to go back to frozen or god forbid the awfulness that lay in a can.
Recipe:
4 cups self rising flour
1 tsp. Baking Soda
2 Tbsp. Baking Powder
3 sticks salted butter ( 3/4 pound) cold & grated
2 eggs
1 1/2 cups Milk (I used 2%)
Bake at 400 °F for 15-20 mins
In a mixing bowl measure out your dry ingredients. Then take your cold sticks of butter and grate it with a cheese grater.
Once you've done that add to your dry ingredients. I then cut in the butter using a pastry cutter. Can also use a wooden spoon or your hands. After your butter is mixed into your flour mixture add in two eggs. (Note) Crack eggs into a separate bowl and whisk together. Then add into your mixing bowl. Stir it into your flour & butter mixture using a spoon or if easier your hands. It's ok to get in there and work with your hands while cooking.
Now turn out your biscuit dough onto your cleaned & floured work surface.
To make your biscuits extra flakey. Roll your dough out until about 1/2 inch thick cutting it in half with a knife. Stack on top of each other and then fold length wise on top of its self. This will help to create beautiful buttery layers.
Now roll out until roughly 1 inch thick and cut with biscuit cutter. My cutter is on the smaller side but you can use any size biscuit cutter.
Place on baking sheet and bake for 15-20 minutes or until golden brown. My smaller biscuits baked for 15.
Let them cool off slightly and enjoy!
xoxo Emily
Disclaimer: Any photos used are mine unless otherwise posted. This post was 100% created by me and photos are copyrighted to TheChicCountryGirl, If your sharing any of them please give credit to this site. This is not a sponsored post
Sunday, May 3, 2020
DIY| Mothers Day Spring Floral Arrangement
What you'll need:
Flowers (I recommend 2-3 varieties)
Foliage (Different green fillers)
Vase
Scissors
Clear Tape
3. Start trimming flowers to the length you want one at a time. Always make them a bit longer than you think at first just in case. Can't regrow a stem!
4. Start arranging now don't be afraid that you are doing anything wrong or it looks bad you just have to kind of keep playing with it and adjusting.
5. Keep arranging your flowers alternating them in somewhat of a pattern you are wanting. You can arrange it so that one angle is the front or have 360 design.
Disclaimer: Any photos used are mine unless otherwise posted. This post was 100% created by me and photos are copyrighted to TheChicCountryGirl, If your sharing any of them please give credit to this site. This is not a sponsored post


